
Why Your Electrical Panel Needs to Be Labeled
Your electrical panel is what connects your home to the main power line. It is also where you will find your home's circuit breakers. Each breaker corresponds to a different area of your home's electrical system. Because electricity can be dangerous, it is important that your electrical panel is up to code, in good working condition and correctly labeled.
If you are performing electrical repairs or doing any work on your home that affects your electrical system, you may need to shut off the electricity to that part of the house. For example, if you are installing a new ceiling fan or lighting fixture, it is recommended that you disconnect the power to that area to avoid an electrical shock injury. If your electrical panel is not clearly labeled, you run the risk of turning off the incorrect breaker and injuring yourself.
Similarly, if you are dealing with a larger emergency, such as a flood or fire, you need to be able to shut the power off quickly. If you have a suspected gas leak, a sparking electrical appliance can create a serious fire or explosion. In addition to shutting off the gas, you should also shut off your electrical power and will need to know where your main breaker switch is, allowing you to shut off power to your whole home.
Keep reading to learn how to label your electrical panel correctly.
How to Label Your Electrical Panel
Before starting, make sure you have all the supplies you need. You want to make sure that your labels are clear, neat and permanent. Black writing on white labels is best. You should use either a black permanent marker or a label maker rather than a pencil or inks that will run or fade. You also need a notepad to draw your floorplan and take notes while mapping circuits.
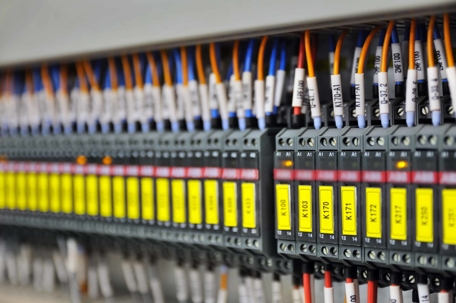
Step 1: Find Your Electrical Panel
Most electrical panels are installed in an area that is easily accessible, such as an already existing utility closet. You may also find it in your garage or basement. In some homes, the electrical panel is located outside. Depending on the age of your home, you may have more than one service panel. You should make a thorough review of your home and locate all electrical panels you have.
Step 2: Number Your Breakers
Once you find your electrical panel, you will need to number your breakers. Starting at the top left, label the switches beginning with #1 and work your way down the first row. Then, move on to the next row, starting at the top and working your way down.
Depending on your electrical panel's size and the number of circuits in your home, there may be room next to the switch to label the circuit. If not, you will need to create a corresponding directory to hang on the inside of the panel door.
Step 3: Create a Map of Your Circuits
Not all electrical circuits are isolated to individual rooms and larger rooms may have more than one circuit. Similarly, larger appliances, such as your refrigerator, will likely be on dedicated circuits. To help you figure out what circuit controls what area, you should draw up a floorplan of your home, including where each outlet, switch or electrical component is in each room.
Step 4: Go Room by Room
To begin mapping your circuits, go room by room, making notes on your floorplan as you go. This systematic approach will help you stay organized. This process is also easier if you have another adult helping you. One person can stand at the electrical panel while the other moves through the house mapping circuits.
Turn everything on in the room. If you have outlets that do not have anything plugged into them, bring in a lamp or other small appliance to plug in. Then, have your helper at the electrical panel shut off the breakers one by one until you identify which breaker controls the power in this room. Make a note of the breaker number and which outlets and fixtures it controls. Then move on to the next room.
If you find that a breaker only controls part of the room, keep working through the breakers until you determine which one controls the rest of the room. Make careful notes of what areas of the room are being handled by what breaker so you can accurately label them at the electrical panel.
Step 5: Label Your Electrical Panel
Once you have mapped all your circuits and what controls what, you can make your labels and directory. Labels should be legible and relatively short. You also want to use terms that are universally understood. That way, anyone who needs to access your electrical panel will find what they are looking for quickly. For example, instead of using terms like "nurseryandquot; or "office," use terms like "northwest bedroomandquot; or "front bedroom." This is also incredibly helpful to future homeowners.
Keep a copy of your circuit breaker directory and your floorplan. If you ever have work done on your home or something happens to the labels on your electrical panel, you will have this extra copy on hand. You can also keep a copy of your floorplan in your electrical panel. You can purchase a clear plastic pocket where you can place the floorplan and directory that can be installed inside the panel door.
What to Do with Unknown Breakers
Sometimes you will have a breaker that does not seem to power anything, despite all your testing. This is especially common in older homes. In these cases, label them in pencil as "unknownandquot; or "spare." If you later find out what to where or what they correspond, you can update the label and directory. You should also ask our electricians to investigate the mystery breaker the next time they are at your house for
Valley Heating, Cooling, Electrical and Solar is here to help for all comfort needs! Call us at (408) 868-5500 today to set up your installation appointment.